Listen to This Article:
Planning a chicken dinner? While proper carving techniques can result in a beautiful table setting, they can also help maximize flavor and tenderness while reducing food waste. Whether you’re a home cook or culinary enthusiast, this step-by-step guide can help you carve a chicken like a pro.
Your chicken needs to rest after cooking, so take a minute to keep reading and discover skills that can help you present a beautiful and delicious plate.

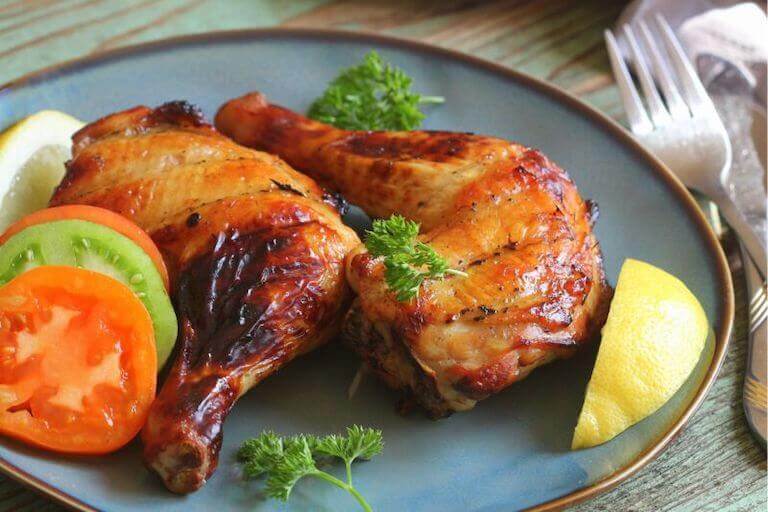
Properly carving a chicken results in beautiful and delicious pieces on your plate.
Kitchen Tools & Equipment Needed to Carve a Chicken
There are only a few key pieces of equipment you need to carve a chicken, which you likely already have in your kitchen.
- Carving Knife: Choosing the right knife matters. Carving knives range in length, typically from seven to 15 inches. Shorter carving knives can be easier to maneuver but make carving larger chickens more difficult. Longer carving knives can allow for a more sweeping motion as you cut.
- Cutting Board: A wood or composite cutting board is ideal to help protect your knives, and a damp kitchen towel beneath it can keep it from slipping. Choose a large cutting board to provide ample room as you work with the chicken.
- Kitchen Gloves (optional): Heat-resistant gloves can help protect your hands and improve your grip as you carve, but they’re unnecessary to complete the task. Kitchen gloves are also good for sanitary purposes and should be removed once you finish working with the meat.
- Carving Fork (optional): Some people prefer using a carving fork to help stabilize the chicken as they carve. However, it is not necessary.
How to Prep the Chicken for Carving
Now that you have the tools and equipment in place, it’s time to prep the chicken. It’s essential to allow the chicken to rest for 15-20 minutes after cooking. This allows the juices to redistribute throughout the meat, helping to result in juicer and more flavorful pieces of chicken.
To rest a chicken, remove it from the heat source and allow it to sit uncovered. While you may want to cover the chicken to help keep it warm, the trapped steam can soften the crispy skin. If you need to retain heat, you can loosely tent foil over the chicken after 5-10 minutes.
Next, transfer the chicken to the cutting board. Place the chicken on its back, breast-side up, to help it stay stable as you carve the legs, wings, and breast meat. Have the legs towards you and wings toward the top of the cutting board. If you trussed the chicken, you can either remove the strings before carving or leave the legs and wings tied as you work.
What Is Trussing?
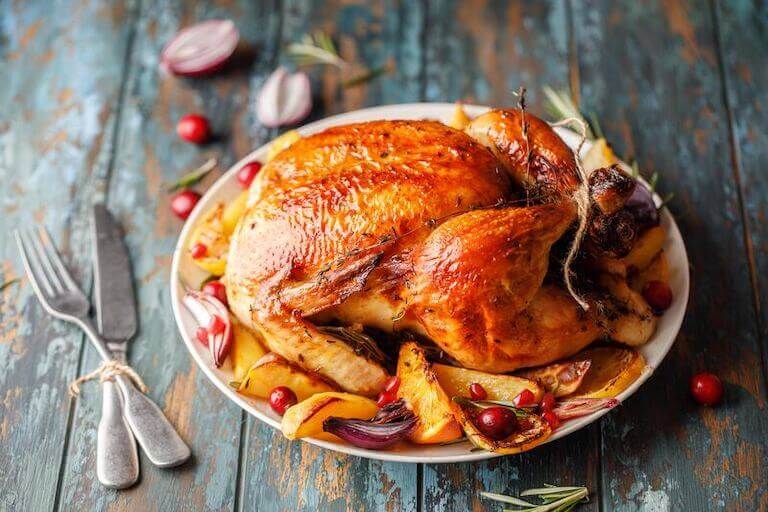
Trussing a chicken is using twine to hold the legs close together and to hold the wings close to the body during cooking. While it results in a pretty presentation of the whole bird, it also helps with even cooking, moister meat, and easier carving.

Trussing can create a beautiful presentation at the table.
Step-by-Step Guide to Carving a Chicken
With the chicken rested and prepped, it’s time to start carving. Using the right knife skills while carving can improve your final presentation. A sharp knife is crucial to help make effortless, clean cuts. You want controlled slices through the chicken. It can help to use long, smooth strokes, but allow the knife to do the work instead of applying heavy pressure.
1. Separate the Legs and Thighs
Begin cutting where the leg meets the breast. Use your non-cutting hand to pull the leg away as you cut. Eventually, you can push the leg down, exposing the ball-and-socket joint. As you push, you’ll likely hear a popping sound as the joint breaks loose. You’ll then be able to cut through the remainder of the way, separating the leg and thigh from the chicken. Repeat on the other side.
To separate the legs from the thighs, place the leg quarter skin-side down and locate the joint connecting the leg and thigh. Using your knife, separate this joint to separate the leg and thigh.
2. Cut the Whole Breasts with Wings
Locate the breastbone running down the center of the chicken. Starting at the thicker end, near the wing, begin slicing against the grain. Keep the knife close to the breastbone as you work your way down toward the cutting board, and carefully maneuver around the wing joint to keep the wing connected. Repeat on the other side.
3. Carve the Breast Meat
If you desire, you can cut the chicken breast into slices using a bias cut, which is cutting at a diagonal to enhance the presentation of the slices. This also allows you to separate the breast meat from the chicken wing before you begin slicing.
Spatchcocking and Carving
Spatchcocking is a technique for removing the backbone from chicken before cooking. This allows the chicken to lie flat in the oven, which can help result in more even cooking. Spatchcocking is optional and not necessary when roasting a chicken.
If you used the spatchcock method to cook the chicken, you can follow the same directions to carve it.

Spatchcocking chicken can help the meat cook faster and more evenly.
Chicken Presentation & Serving Suggestions
When you’re finished carving the chicken, it’s time to showcase your culinary skills. These tips can help you deliver a stunning presentation to your dinner guests.
Plate It Like a Pro

Artfully plating your chicken can make your work look that much better.
How you plate the chicken can make a difference in the final presentation. White or light-colored serving dishes help chicken pieces stand out against the background. Choosing a platter large enough to showcase all of the pieces neatly can create a stunning presentation.
Remember that arrangement is key. There are a couple of popular options for displaying sliced breast meat. You can fan it out on the platter with the wing carefully positioned at the side, or you can stack the breast meat and decoratively display the wing on top. Then, finish off the presentation by scattering fresh herbs, such as finely minced rosemary or thyme, around the chicken for an added pop of color and appeal.
Make Sure the Chicken Is Warm
The meat will cool as you carve it, but there are ways to help ensure it remains enjoyable for your guests. You can warm it back up by preheating a serving platter in the oven at around 200 degrees. Transfer the chicken pieces onto the platter prior to serving. You can also serve the chicken on warmed plates to help retain some of the heat. Overall, carving the chicken closer to serving time is the best way to maintain warmth prior to serving.
Complement It with Sides
You can elevate your chicken dinner with delicious accompaniments:
- Roasted Vegetables: Carrots, broccoli, or Brussels sprouts can add vibrant color and nutritional value to your meal. The textures can also provide a nice contrast to the tenderness of the chicken.
- Starchy Sides: Mashed potatoes, rice pilaf, or creamy grits can create a base for the chicken and help soak up the flavorful drippings.
- Refreshing Salads: A crisp salad with a vinaigrette dressing can add a touch of freshness to the richness of the chicken.
- Don’t forget the Gravy: For extra flair, reserve the pan drippings from the chicken to create a simple gravy.
What About Cutting the Chicken Prior to Cooking?
Carving the chicken after cooking can help produce more tender and flavorful meat and can be an easier process for beginners. However, you may have a recipe that calls for fabricating the chicken before cooking. This is the process of breaking down the chicken into individual pieces while it’s still raw.
Fabricating can make it easier to handle chicken as you marinate or cook it since you’re working with smaller pieces. It also results in faster cooking times.

Fabricating a chicken is breaking it down into pieces prior to cooking.
While there are various techniques for fabricating chicken, the basic version can be completed using the same instructions above.
Additional Tips for Success
The carving essentials shared above can help you carve and present chicken like a pro. However, the following tips can make the process easier.
- Use a sharp knife: Sharp knives result in clean cuts. Hone and sharpen your knives to keep them functioning at their best.
- Take your time: Rushing the cuts can result in tearing and uneven slices. Take your time and use a long, smooth motion if needed.
- Practice makes perfect: Don’t be discouraged if your first attempt doesn’t come out perfect. Practice can help you become more comfortable and confident in your carving skills.
Building Your Carving and Culinary Skills
Carving a chicken may seem daunting initially, but following the steps above may help you gain confidence in your carving skills. With practice, you can be on your way to delivering beautifully plated presentations of moist and flavorful chicken.
Remember to prep carefully and have a sharpened carving knife ready. Continue practicing and experimenting with your carving techniques to improve and develop your skills.
Learning to carve a chicken can be just the beginning of your culinary journey. A culinary education can help you continue expanding on your knife and culinary skills. Contact us to begin exploring the culinary opportunities that await.

